
Go Vertical for a Change of Composition!
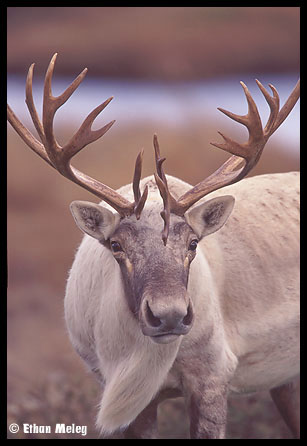
Caribou - Gros Morne
National Park, Newfoundland Common
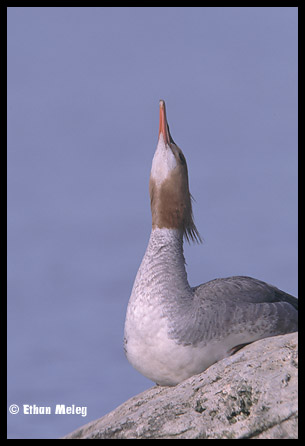
Merganser - Wiarton, Ontario
If I could add one rule to the art of photography, it would be ‘The Vertical Rule’. I’d love to see it in every chapter on composition in every photography book, directly after the Rule of Thirds. The gist of the ‘The Vertical Rule’ is very simple: if your subject is taller than it is wide, tilt your camera on its side and shoot in vertical format. Pretty easy rule, eh!
I first got hooked on going vertical when I began photographing tall birds such as herons and egrets. The dimensions of these birds don’t lend themselves well to horizontal compositions (remember that film is rectangular, not square!). As horizontals, I often inadvertently cut off feet or tops of heads, and I rarely had the bird in more than 30% of the frame (this can result in a large awkward open space in the rest of the image). By shooting vertical, I’m able to fill most of the frame with the subject and the resulting compositions are much more natural and pleasing.
These days, I shoot vertical for about 50% of my photos - and not just with subjects that are taller than wide. Wherever possible, I make as great a variety of compositions for any one subject as possible. I like the diversity of the resulting images and having a good selection of images to fit the needs of publishers (who always need vertical images!).
Going vertical is as easy to do as turning your camera on it’s side and firing away, but there are some accessories that can help make it easier:
A vertical grip: My favorite camera accessory is a vertical grip which screws into the bottom of your camera body, and allows you hold your camera in vertical format and still have a set of controls (ie. shutter button) just like if you were holding your camera horizontally. Although this accessory makes shooting verticals a piece of cake, they are darn expensive!
Rotating Collars: Most high quality medium to telephoto lenses come with a rotating collar that allows you to rotate the lens and camera freely while they are still firmly attached to the tripod head. This is an invaluable feature for making quick changes between horizontal and vertical formats. Just be sure to tighten the collar each time to prevent unnecessary camera movement or shake.
A Ball Head: Since you’ll likely be using a tripod most of the time, a good ball head will make rotating your camera into vertical format easy and quick. Make sure the head has a slot which allows the ball to rotate a full 90 degrees to a vertical position.
Next time you’re out in the field, keep ‘The Vertical Rule’ in the back of your mind. Ask yourself it the subject is taller than wide. Try as many different compositions as you can. Just be sure to leave room in the photo for the words National Geographic!
This
site © Ethan Meleg, all rights reserved. No form of reproduction,
including copying or saving of digital image files,
or the alteration or manipulation of said image files is
permitted. Any unauthorized use of these images will be
prosecuted
to the full extent of federal copyright laws. Site design and
maintenance by Ethan Meleg.